구글 API 등록을 마쳤다는 전제하에 진행합니다.
구글 소셜 로그인
전체적인 흐름은 아래의 사진과 같다.
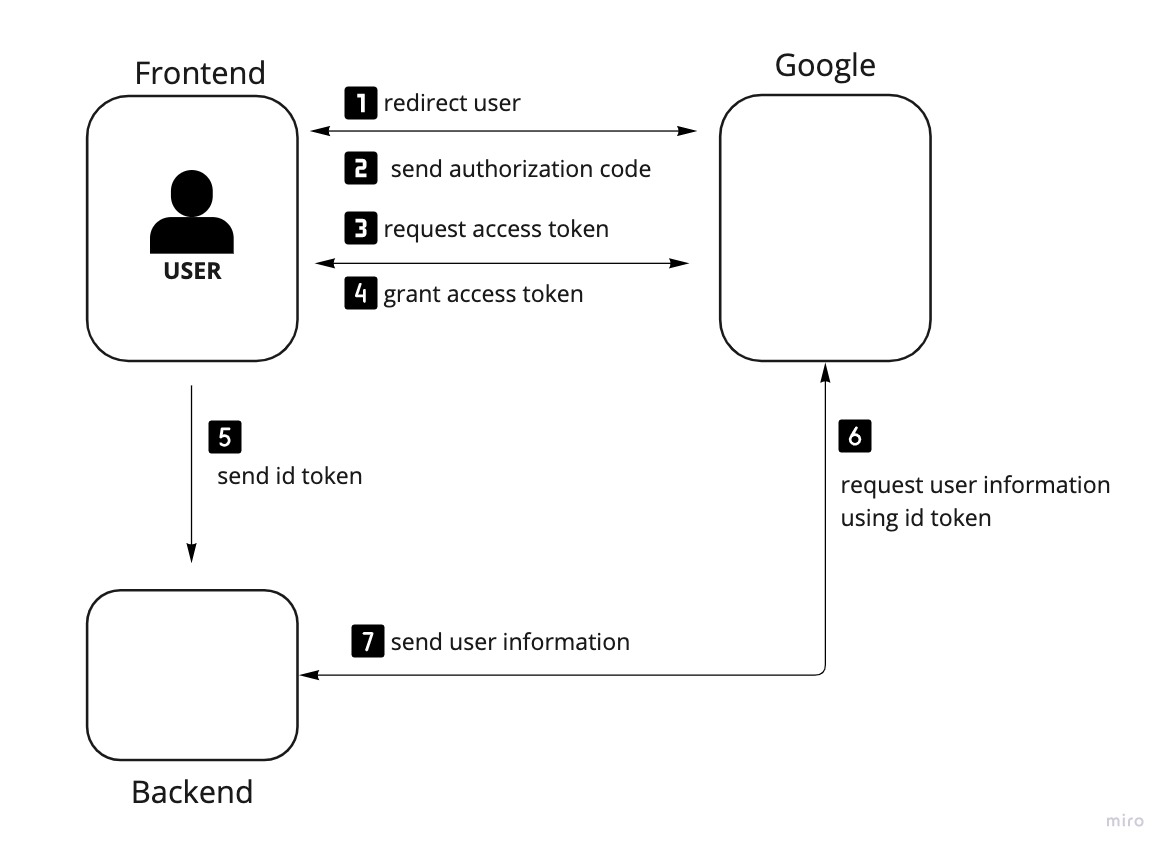
복잡해보이지만 크게 아래의 세단계로 이루어진다.
1. 사용자를 구글 authorization page로 보내 code 받기
URL
POST /o/oauth2/v2/auth
Host : accounts.google.com
Parameter
| 이름 | 설명 |
|---|---|
| cliend_id | 구글 API 클라이언트 아이디 |
| redirect_uri | 구글 API 에 등록한 리다이렉트 URI |
| response_type | code |
| scope | https://www.googleapis.com/auth/userinfo.email, https://www.googleapis.com/auth/userinfo.profile |
1
2
3
#example

https://accounts.google.com/o/oauth2/v2/auth?client_id=${client_id}&redirect_uri=${redirect_uri}&response_type=code&scope=https://www.googleapis.com/auth/userinfo.email https://www.googleapis.com/auth/userinfo.profile
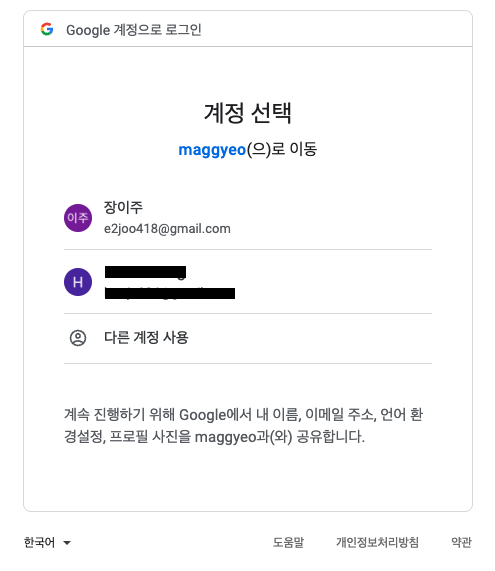
URI를 주소창에 입력하면 로그인 창이 뜨고 인증을 마치면 redirect_uri 에 입력한 주소로 리다이렉트 되며 authorization code 를 받을 수 있다.

테스트를 위해 redirect uri를 로컬호스트로 지정해놓은 상태. 쿼리 파라미터로 코드가 return 됐음을 확인할 수 있다.
2. authorization_code로 token 받기
URL
POST /oauth2/v4/token
Host : www.googleapis.com
Header
| 이름 | 설명 |
|---|---|
| Content-Type | application/x-www-form-urlencoded |
Parameter
| 이름 | 설명 |
|---|---|
| cliend_id | 구글 API 클라이언트 아이디 |
| client_secret | 구글 API 클라이언트 보안 비밀번호 |
| redirect_uri | 구글 API 에 등록한 리다이렉트 URI |
| grant_type | authorization_code |
| code | 1번에서 받아온 authorization code |
1
2
3
#example

https://www.googleapis.com/oauth2/v4/token?code=${code}&client_id=${client_id}&client_secret=${client_secret}&redirect_uri=${redirect_url}&grant_type=authorization_code
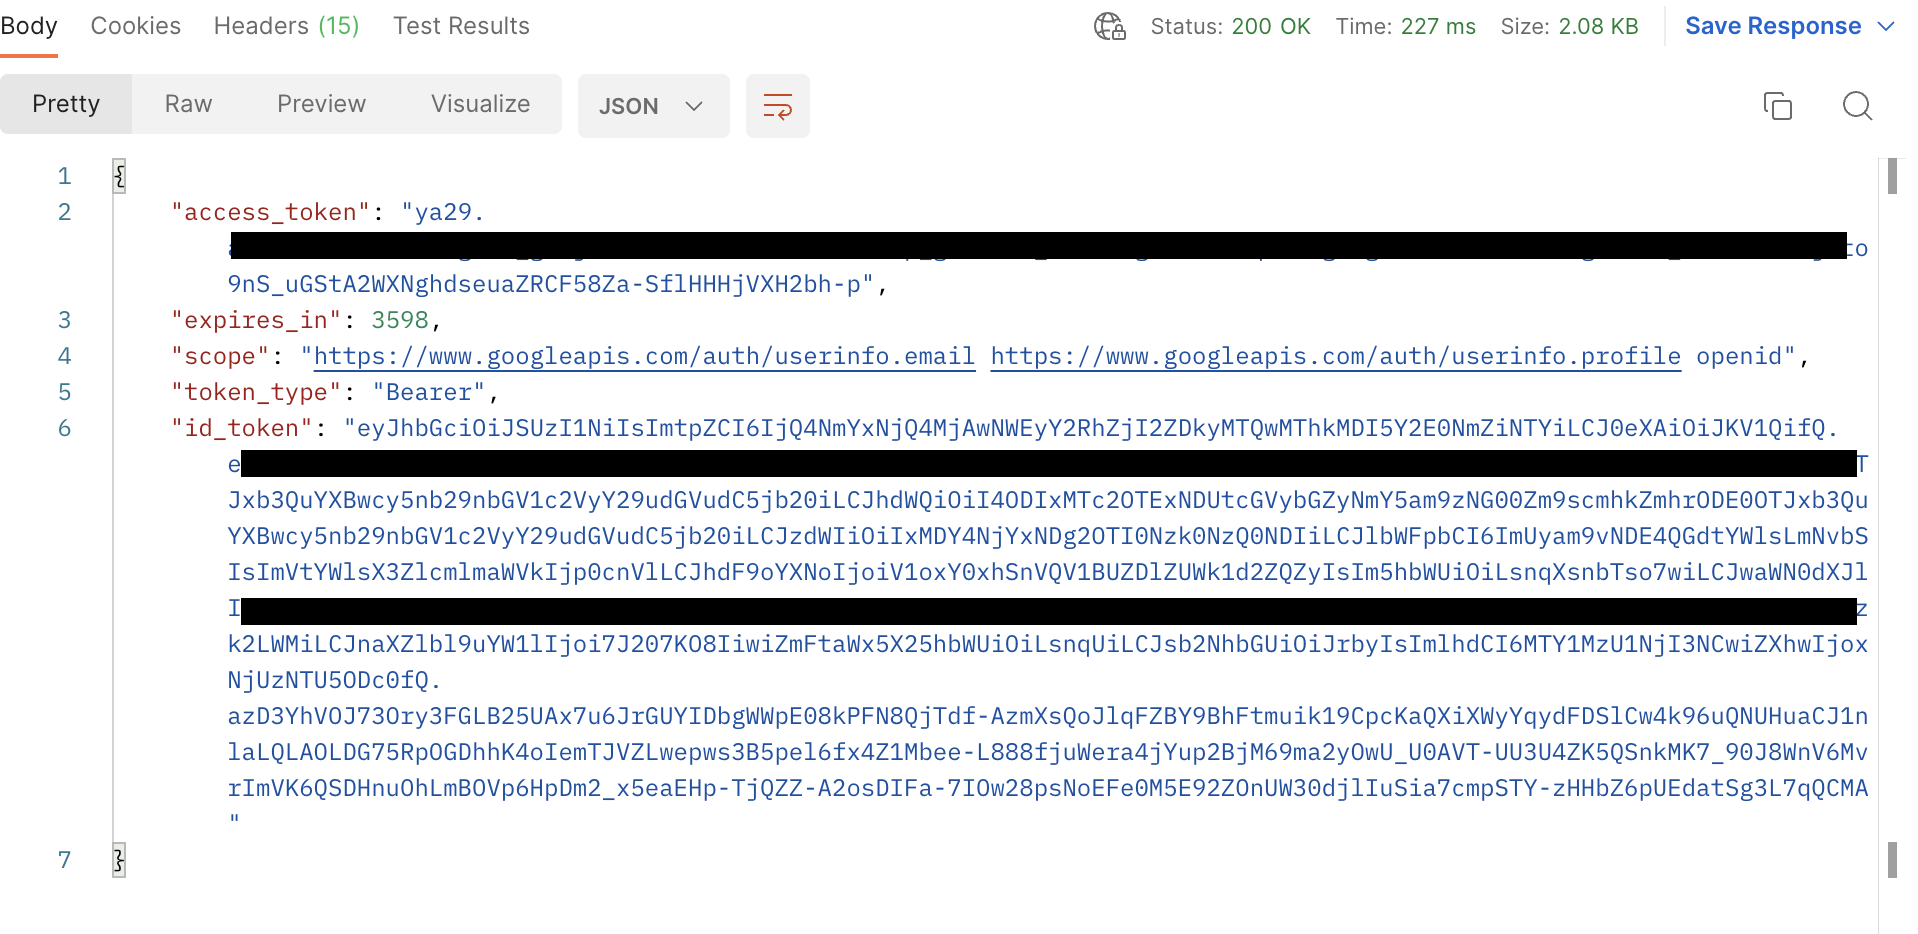
POSTMAN으로 요청을 보낸 결과 access_token과 id_token가 반환되는 것을 확인할 수 있다.
3. id token으로 사용자 정보 받아오기
URL
POST /tokeninfo
Host : oauth2.googleapis.com
Parameter
| 이름 | 설명 |
|---|---|
| id_token | 2번에서 받아온 id_token |
1
2
3
# example

https://oauth2.googleapis.com/tokeninfo?id_token=${id_token}
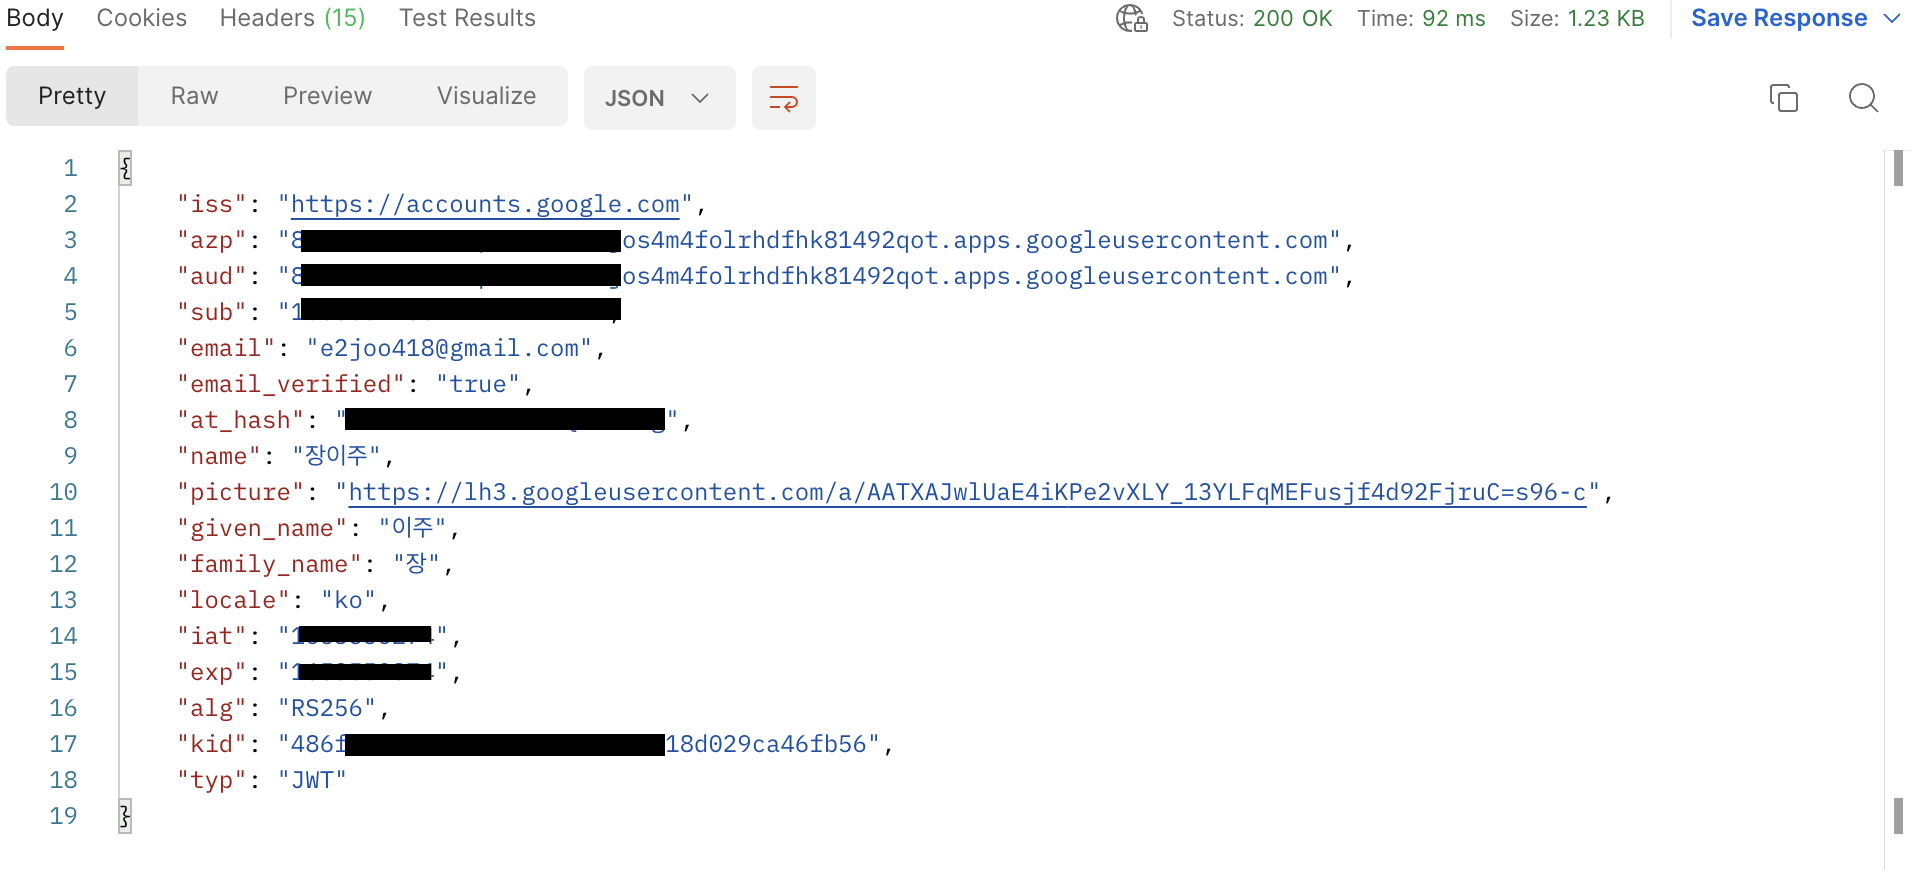
뭐가 가려야하는 개인정보인지 헷갈려서 다 가렸다 (…)
POSTMAN으로 요청을 보낸 결과 사용자의 구글 프로필 정보가 반환된다. 이 중에서 name, picture, email 을 DB에 저장하고 회원가입을 진행하도록 할 것이다.